There are several ways to automate the dynamic update process on a Mac. Here are the two most common and simple ways to set it up. We recommend using the Terminal method because it's quicker to set up and works regardless whether the user is logged in or not. GUI way takes a little longer and only works when the user is logged in, however is more user friendly if you are not comfortable with the terminal.
1. Terminal
- Open 'Terminal.app' from Applicatinos -> Utilities folder.
- Type the following command
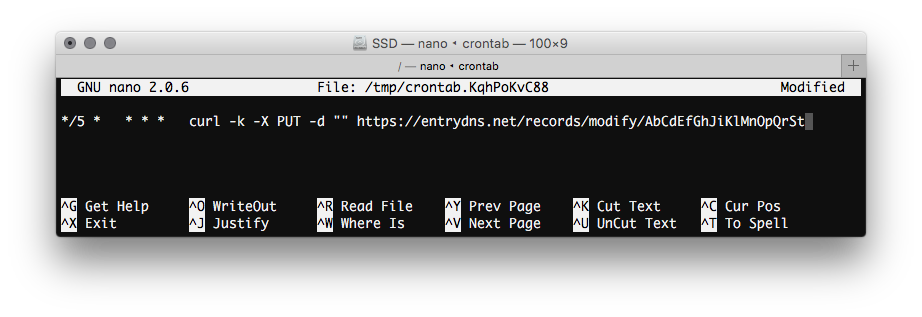
- Add the following line. Make sure you replace the token with a real 20 character token from your control panel. 30 means your IP will be updated every 30 minutes. Please follow crontab guide here for correct format if you need to change the time.
- Press 'ctrl + x' on your keyboard, then 'Y' and 'Enter'. That's it.
env EDITOR=nano crontab -e
*/30 * * * * curl -k -X PUT -d "" https://entrydns.net/records/modify/TOKEN
2. GUI
- Download 'Update entryDNS' script from here.
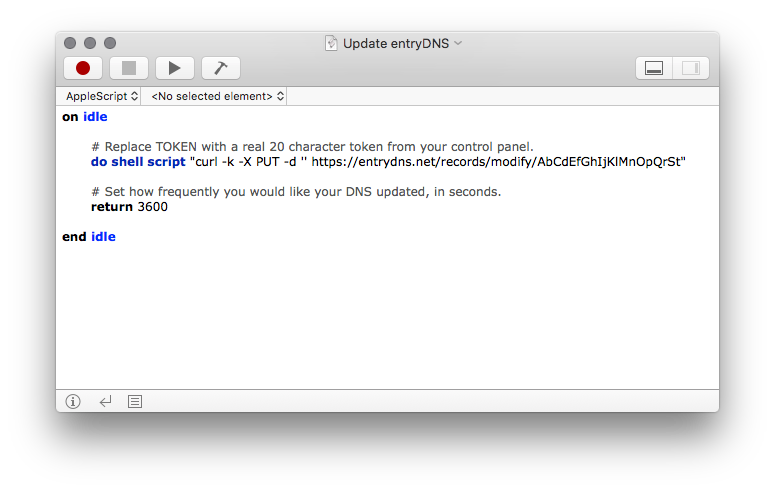
- Open the file with 'Script Editor.app' located in Applications -> Utilities folder.
- Replace the TOKEN with a real 20 character token from your control panel. You can also change the update frequency (in seconds) by editing the number next to return.
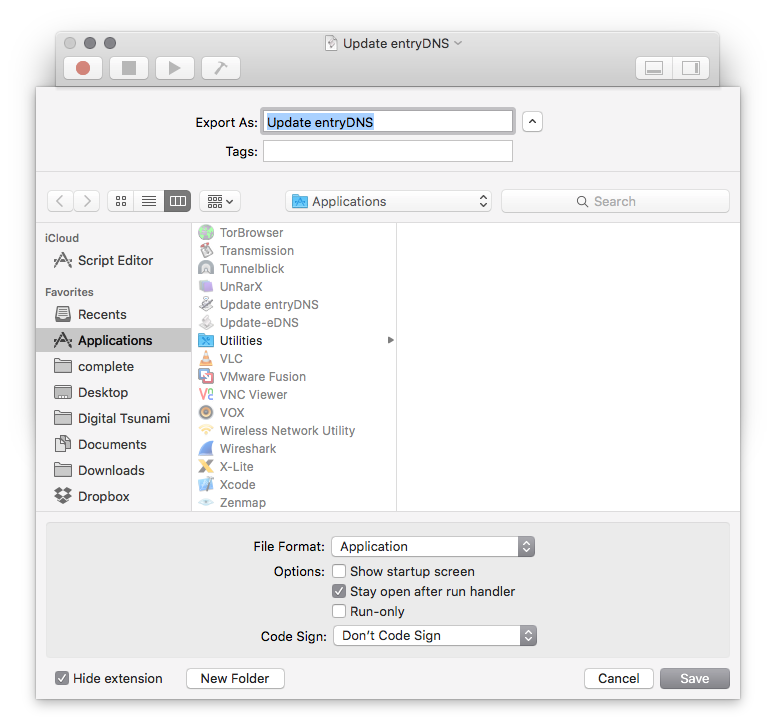
- Go to 'File' -> 'Export'. Choose File Format 'Application' and tick 'Stay open after run handler'.
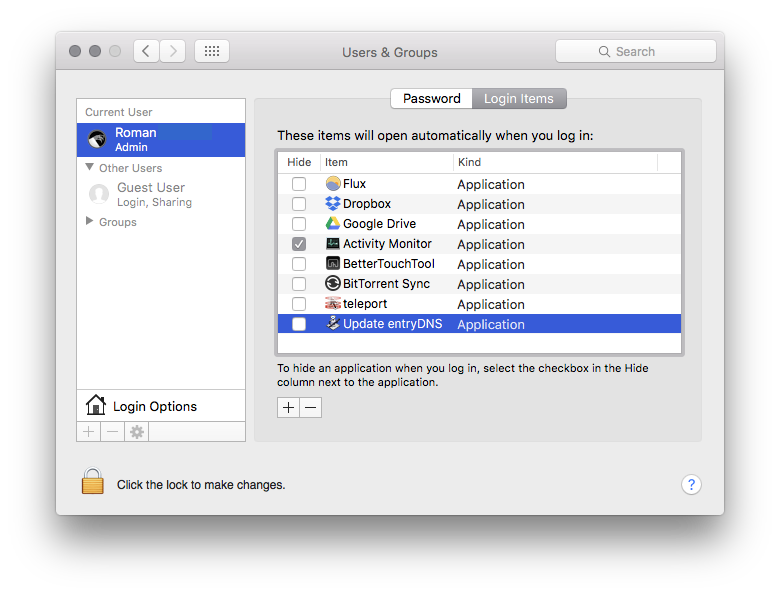
- Go to 'System Preferences' -> 'Users & Groups' -> 'Login items' and add 'Update entryDNS' so it starts when you log in.
- (Optional) If you like to remove the dock icon, right-click Update entryDNS.app in Applications folder and choose 'Show package contents.' Open Info.plist with TextEdit and add the following two lines after "<dict>".
<key>LSUIElement</key>
            <string>1</string>